Sublimating mugs at home is easier than most people think. With a few pieces of equipment and the right technique, you can produce professional-quality custom mugs from your kitchen table, garage, or small workshop.
This guide walks you through every step.
What You’ll Need
| Item | Notes |
|---|---|
| Sublimation blank mug | Must have sublimation coating. Standard white 11oz is the easiest to start with. |
| Sublimation printer | Converted inkjet with sublimation ink, or a dedicated sublimation printer like Sawgrass. |
| Sublimation paper | High-release transfer paper designed for hard surfaces. |
| Heat press machine | A mug press is ideal. Flat heat presses with a mug attachment also work. |
| Heat-resistant tape | To hold the transfer paper tightly against the mug. |
| Protective gloves | The mug comes out extremely hot. |
| Design software | Anything you’re comfortable with — Photoshop, Canva, or even Word for simple designs. |
Step 1: Prepare Your Design
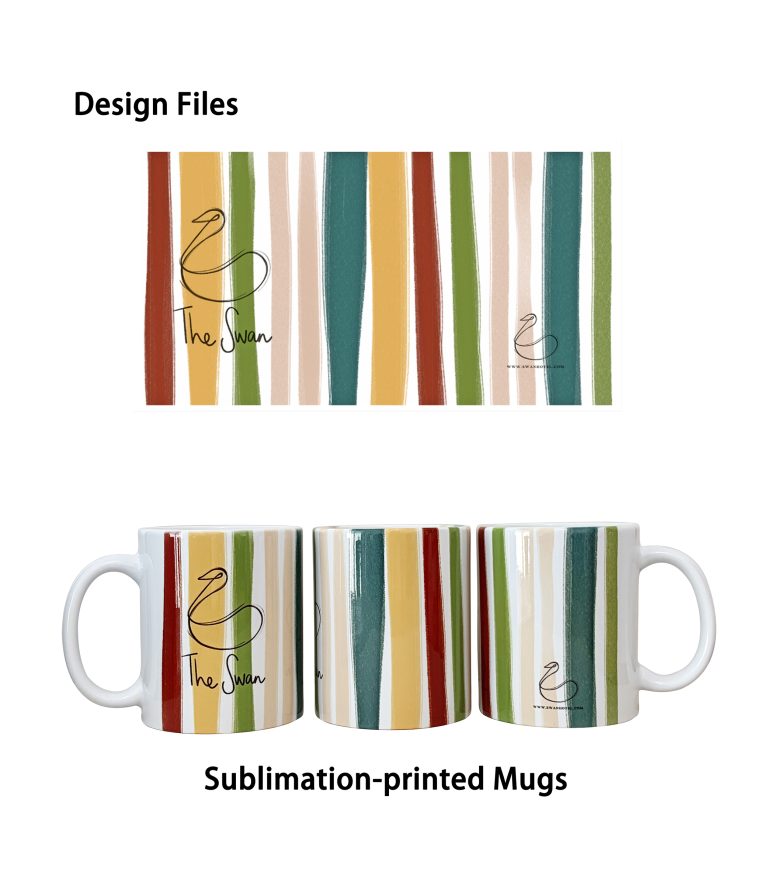
Create or select your design. Size it to fit an 11oz mug — typically around 200mm × 85mm for full wrap, or smaller for a front-facing design. Mirror the image before printing, so it transfers in the correct orientation.
Tip: Sublimation prints appear slightly lighter on paper than they will on the mug. Don’t overcompensate — the colors intensify during transfer.
Step 2: Print Your Design
Load sublimation paper into your printer. Print your mirrored design at the highest quality setting. Let the print dry completely before handling — wet ink will smudge and transfer poorly.
Use the correct ICC profile for your ink and paper combination if color accuracy is important.
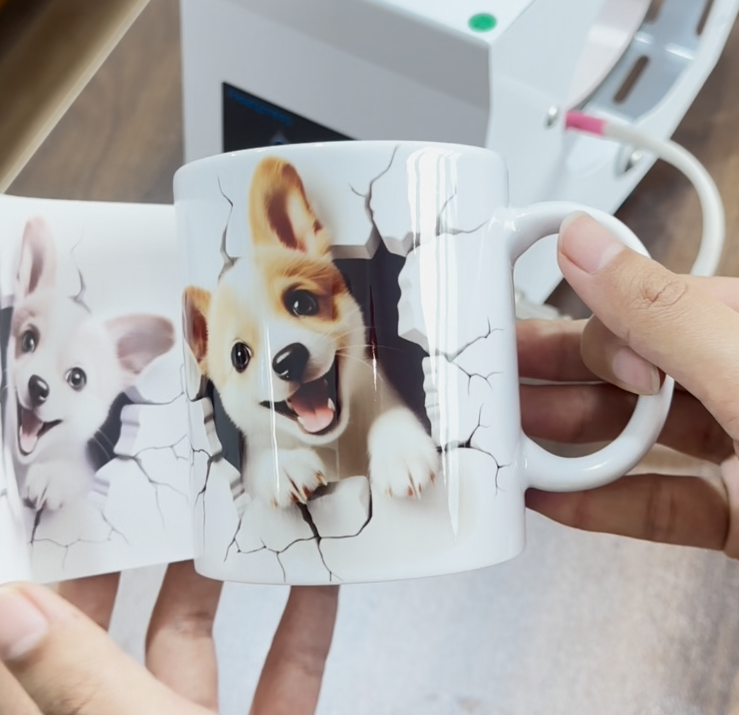
Step 3: Position and Secure the Transfer
Place the printed side of the paper directly against the mug surface. Wrap it tightly. Use heat-resistant tape along the edges to hold it firmly in place. Any gap between paper and mug will cause blurry or faded spots — this is the most common beginner mistake.
Tip: Tape the top, bottom, and sides. The tighter the contact, the sharper the print.
Step 4: Set Temperature and Time
Recommended starting settings:
| Parameter | Setting |
|---|---|
| Temperature | 180°C – 200°C (356°F – 392°F) |
| Time | 180 – 240 seconds (3–4 minutes) |
| Pressure | Medium to firm |
These vary by heat press model and mug coating. Check your blank supplier’s recommendation. SEEFY’s 11oz sublimation blanks, for example, perform optimally at 200°C for 180 seconds with medium pressure.
Step 5: Press the Mug
Place the taped mug into the preheated mug press. Close the clamp firmly. Start the timer.
Don’t walk away — keep an eye on the process. If you see steam or smell burning, that’s normal to a degree, but excessive either means the temperature is too high or the mug coating is low quality.
Step 6: Remove and Cool
Once the timer ends, open the press carefully. The mug is extremely hot. Use protective gloves to remove it.
Peel off the transfer paper immediately while the mug is still hot. Some coatings work better with a “hot peel,” others with a “warm peel.” Test which gives you the crispest result on your blanks.
Place the mug on a heat-resistant surface to cool. Do not put it in cold water — thermal shock can crack the ceramic.
Step 7: Inspect Your Print
A good sublimation print should be:
- Vibrant and sharp
- Smooth to the touch (no raised edges)
- Consistent across the entire image area
- Free of ghosting (blurred double image from paper shifting)
If you see faded areas, the paper wasn’t tight enough. If colors look dull, increase temperature or time slightly on the next attempt.
Common Beginner Mistakes and Fixes
| Problem | Likely Cause | Fix |
|---|---|---|
| Blurry or ghosted image | Paper shifted during pressing | Tape tighter; avoid bumping the press |
| Faded patches | Paper not in full contact with mug | Tighten tape; increase pressure |
| Dull colors | Temperature too low or time too short | Increase by 10°C or add 30 seconds |
| Yellowish or burnt look | Temperature too high | Reduce by 10°C |
| Print looks fine but washes off | Mug has no sublimation coating | Make sure you’re using sublimation blanks |
How to Test a New Blank Mug
Every time you try a new supplier or grade, run a test print. Use the same design, same settings, and same paper. Compare:
- Color vibrancy
- Edge sharpness
- Dishwasher durability (run through 5 cycles and check for fading)
This systematic approach will quickly show you which blanks perform best — and which ones to avoid.
Your Next Step
High-quality blanks make all the difference. SEEFY manufactures 11oz sublimation blank mugs with tested coating and three quality grades — AAA, A, and AB — so you can choose the right blank for your market.